
When looking at the growth of your business website, it is vital that you frequently check your website analytics to see the trends and changes that occur every day.
Google Analytics metrics provide you with a range of data, including visitor data that can help you identify why people are going onto your site and how they are finding you. Using Google Analytics can help you to further understand your customers behaviour, user experience and much more.
Google Search Console allows you to look and observe any server errors, and in some cases, resolve them. This includes site load issues and security issues against threats such as hacking and malware. Google Search Console allows you to monitor essential site maintenance and helps you with any adjustments you need to make to maintain optimum search performance.
Unfortunately, a lot of websites do not use these tools. According to statistical research by the Hosting Tribunal, there are around 400 million active websites, with only an estimated 30-50 million websites using these tools. Sometimes this is due to the complexity associated with the setup process, which is why in this article, I am going to go through each individual step you need to take to set up both your Google Analytics and Search Console accounts, and how to add users into them.
Contents:
- Set up Google Tag Manager
- Google Analytics set up
- Analytics tag to Google Tag Manager set up
- How to set up Goals
- How to set up Google Search Console
- How to link your Google Analytics & Google Search Console
- How to add users to Google Analytics
- How to add users to Google Search Console
Where to start
Often we see clients have websites without a Google Analytics account because the first time they look at the process on how to connect, it looks too daunting and they decide against it.
It can look daunting, but if you take the time to go through the steps I am about to show you, and you can easily set it up (you get to feel SUPER smart after, trust me.)
This process in the long run is a small amount of set up work, to the comparison of metrics and data you will receive later on.
1. Set up Google Tag Manager
I can already see it now, you’re looking blankly at the term ‘Google Tag Manager’ (well that was me when I first heard of it too).
Google Tag Manager is simply a tag management system from Google that is completely free.
The reason you need Tag Manager is because it takes all of the data you have on your other platforms, such as social media analytics (like Facebook) and your Google Analytics.
Google Tag Manager lets you easily add tags to your Google Analytics code, instead of doing it all manually. So, for example if you have placed a downloadable guide onto your site and you want to see how many people have downloaded it, all you need to do is add a tag to track the metrics.
To begin with, all you need to do is create an account on the Google Tag Manager dashboard.
- Setup Account – The first thing you add will just be your account name and country.
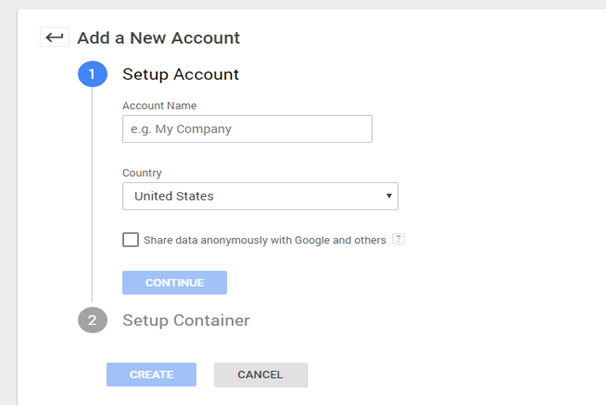
Imagine Credit – eComOne
- Setup Container – You will then have to create a container, which is basically an area containing all the rules and tags of your site. All you need to do is create a container name and then choose where to use this container (so if you want this for the web, IOS, Android etc.)
- Installation Code – After you have done that, click create, then review the terms of service and agree to them. From there you will be given the containers installation code snippet, which will look like this –


Image Credit – eComOne
- Implementing Google Tag Manager onto your site – To actually place the code onto your website, you need to copy the first section of JavaScript and paste this as close to your opening <head> tag as you can, then also paste the second part of the Javascript code after the opening <body> tag.
This needs to be done on EVERY page of your website.
Implementing on a WordPress site – Most WordPress themes now provide a section where you can implement the code into a specific area or by pasting the Google Analytics UA ID into a specific location. With the power of the theme, it should mean that you only need to paste the codes into one area and that will be implemented onto all of your pages.
If you cannot find an area to implement the code into your theme, then you can simply install a plugin that can do the job, a great one being, Yoast.
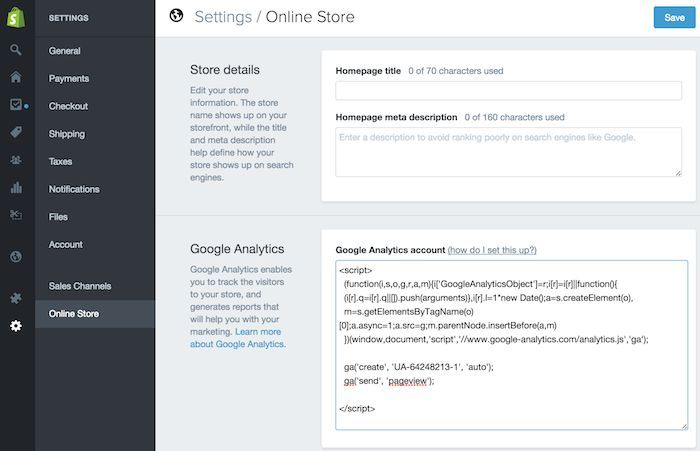
Implementing on a Shopify site – If you use Shopify for your eCommerce store, you can go onto to your online store settings and paste the tracking code where labelled below –
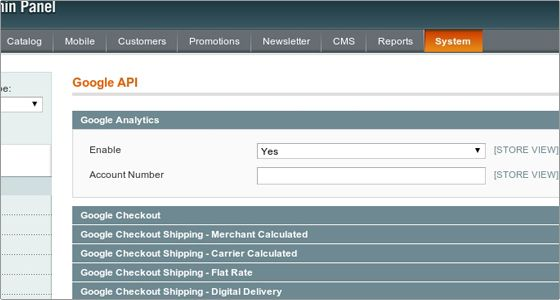
Implementing on a Magento site – To implement your tracking code onto your Magento site, simply –
- Open the Admin section, navigate to System > Sales > Google API and expand the Google Analytics area.
- Pick Yes from the Enable drop down menu and enter your Google Analytics account number in the stated section and click on the Save Config button & that is all done!
2. Google Analytics set up
Look at you! You have reached step 2 already.
Just like you have with Google Tag Manager, you now need to create an account with Google Analytics.
This time all you need to do is:
- Click Signup
- Select if you are tracking a Website or Mobile App
- Fill in the needed information –
- Account name (Generally the company name)
- Website name (The website being tracked, this may be the same as the account name)
- Select if the site is http:// or https:// – This is important, as you need to track the correct version of your site
- Input the URL of the site that you want tracked
- Pick the relevant Industry Category (If you can’t find your niche in a category or non are available, select other)
- Select your Time Zone
- Leave the other settings as the recommend default options
- Click – Get Tracking ID
- Accept the all important T&C’s
After this you will the receive your tracking ID – 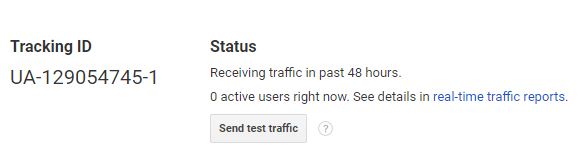
The tracking ID is unique to your website and your personal data – so do NOT share your tracking ID with anyone publicly.
3. Analytics tag to Google Tag Manager set up
With this step, you will be able to set up specific Google Analytics tracking tags for your website by the end.
So, now your code is implemented nicely on you website, you are ready to make your first tag (as the picture displays below) select New Tag –
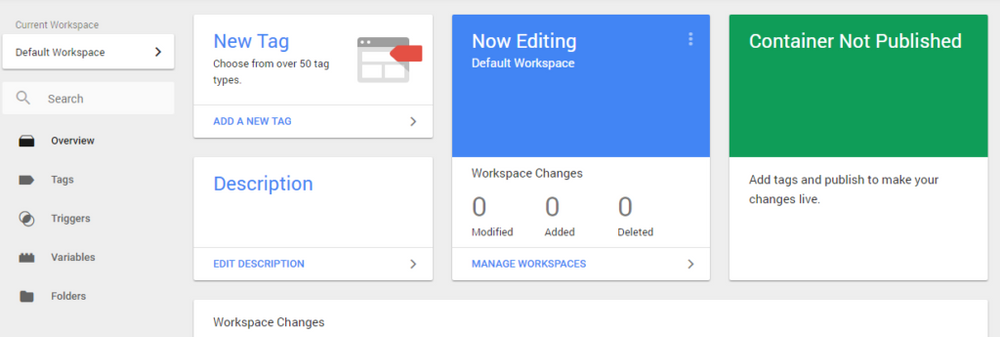
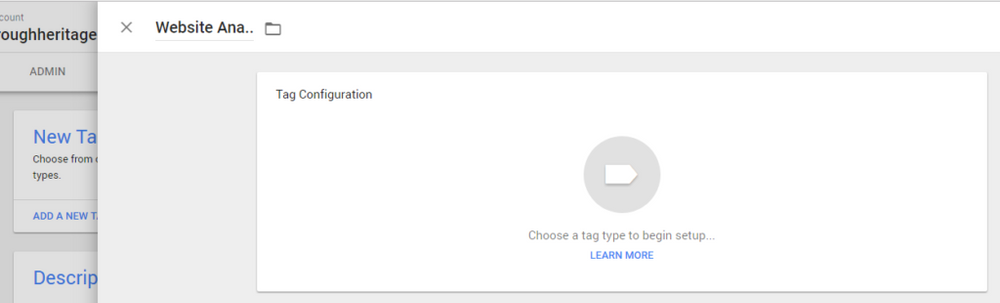
When clicking, in the field that displays Untitled Tag, give your new tag a new MEANINGFUL name, so, for example if you are setting up analytics, you could name it ‘(Your Site) Analytics’. When you have chosen a name for your tag, click on the box called Tag Configuration where this will display a pop out menu – Choose Tag Type –
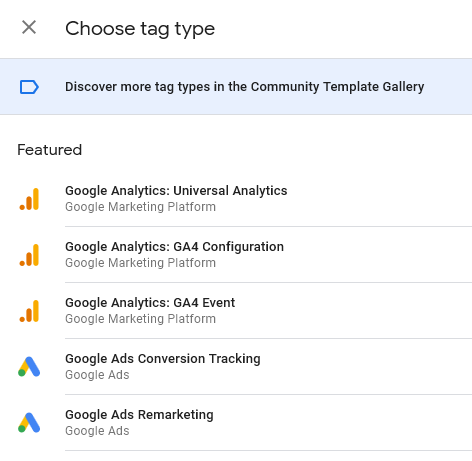
From this pop out menu, you then choose Universal Analytics –
Then, you need to fill out the following option in the form that appears. As this is the first time you are adding anything to your new analytics, you will select Page View as your track type –
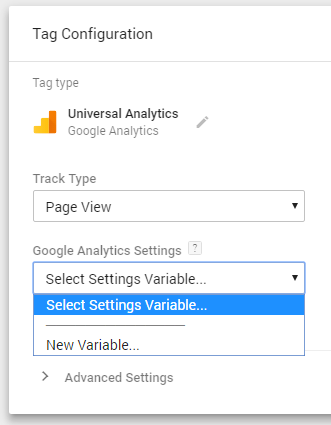
Then under Google Analytics Settings click on the drop down and select New Variable.
Google Analytics settings variable allows you to use and maintain your settings across tags, and you may configure these settings for this tag independently, by checking the override checkbox. However, if you don’t select a Settings Variable, then you must set your Tracking ID via the Override Settings.
How to find your Google Analytics Tracking Code
To begin, you need to sign in to your Google Analytics account, click Admin and select an account from the menu in the Account column.
Then, select a Property from the menu in the Property column. Under Property, click Tracking Info > Tracking Code.
Then your tracking ID should be displayed at the top of the page.
Adding Google Analytics ID to Google Tag Manager
To add your ID, you need to return to Google Tag Manager and paste the number in the required field.
Whilst you are doing this, you will also see an option to add more customisable settings, and for example, just say you are an e-commerce store, then you can tick Enable Enhanced eCommerce Features and then Data Layer.
Once you have done this, all you need to do is click Save and in the Rename Variable section, provide a meaningful name.
TAG Trigger
Now that is done, you will be sent back to the previous screen, where you can set the triggering for your tag. Click on the large icon – Choose A Trigger To Make This Tag Fire. And, for basic implementation, select All Pages.
Once you have successfully created your new tag, you now need to publish it to the website, but it is better to check that it is working as you would like it to, before you actually publish to your live site!
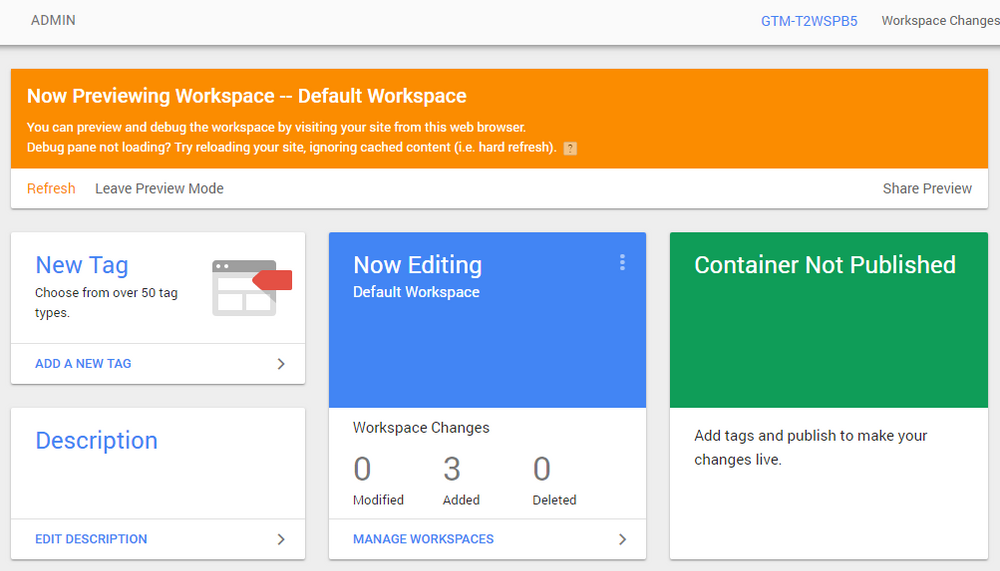
This is completed by utilising the Preview & Debug mode of Tag Manager, then from the workspace homepage, click the Preview button on the top right, and then screen should then look like this –
Now, if you go to your live site, you will see the debug window has appeared at the bottom of the screen, like this –
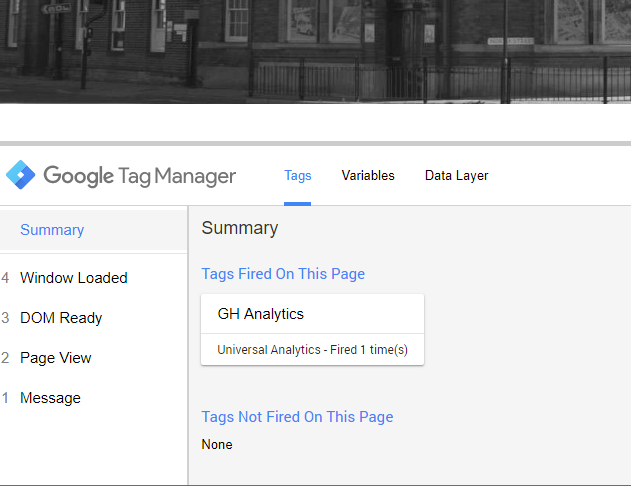
From this image, you can see that the new tag has worked successfully on the page it is reporting, in this instance we named the tag – GH Analytics. Whilst you are checking, you should also make sure to check on several other pages on your site too, before making it live.
Deploy
Here we go, the exciting part!
To officially deploy the new tag, simply click the Submit button, then next to the Preview button mentioned earlier, fill in the details for your Version Name and a description of what you’ve done (this is optional.)
Now, only a couple more steps –
You need to check a few things to see if Tag Manager is reporting all of this correctly.
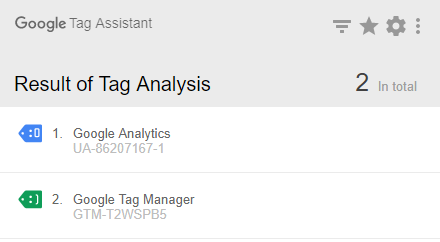
- If you are using Google Chrome Browser, then you can add the Chrome Extension – Google Tag Assistant, which will allow you to test any tags on your site by only clicking the icon on your browser taskbar. This is what the result should look like –
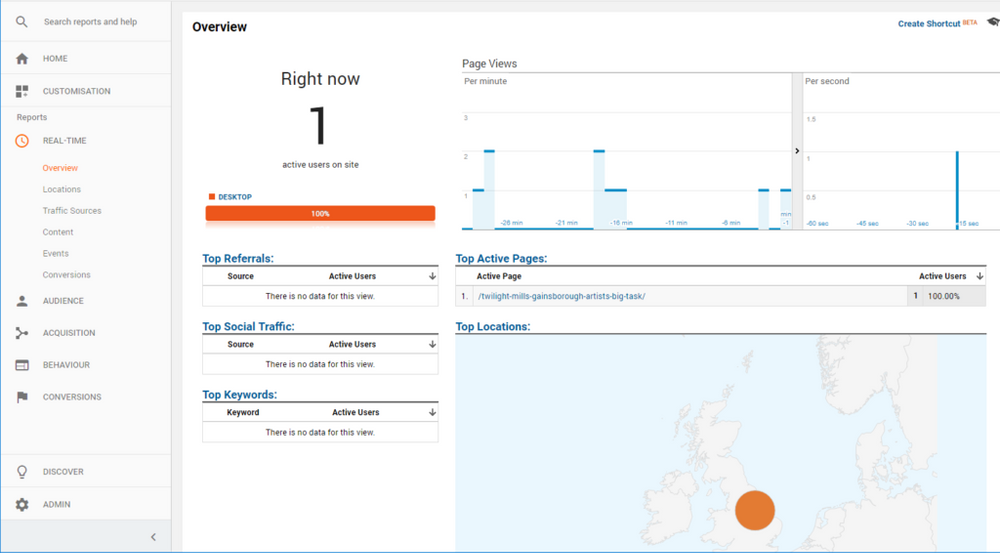
- The second option you have, is to view your analytics data in REAL-TIME. To do this, login to your Google Analytics account and select the account you want to refer this from, then from the left menu, choose REAL-TIME, then Overview.
Then, view a page on your site and you should see the activity happening, like this image below –
4. Goals, Goals, Goals. How to set up Goals.
For this step, you need to create goals so Google knows what success looks like for your website.
- To begin with, click on the ‘Admin’ button on the bottom left corner of the Google Analytics Home page.
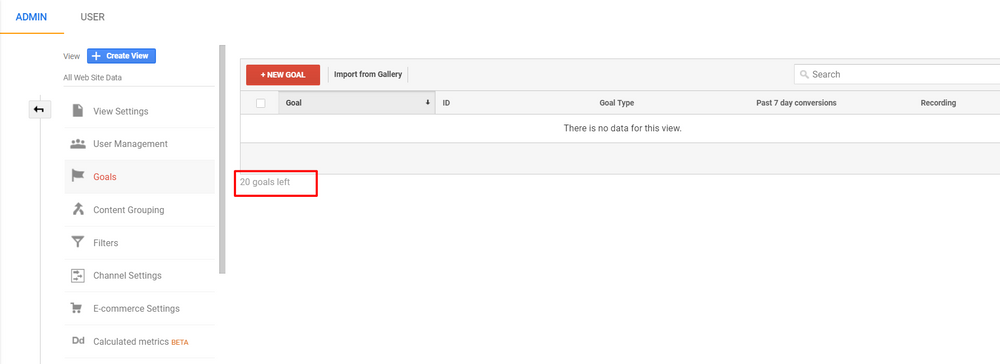
When you click this, you will be sent to another menu where you will find the ‘Goals’ section 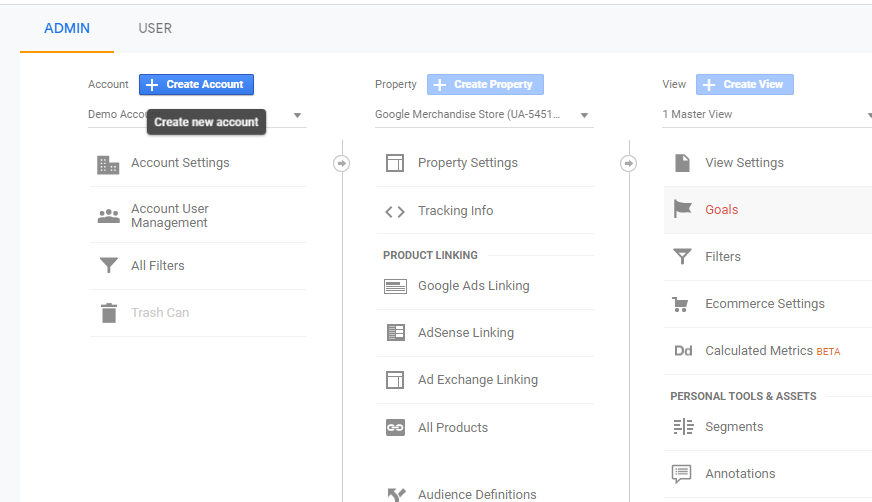
- When you click that, you will be taken to the Goals dashboard. Here, you will see that you can create 20 goals per view. The number of remaining goals is shown here as well, see below –
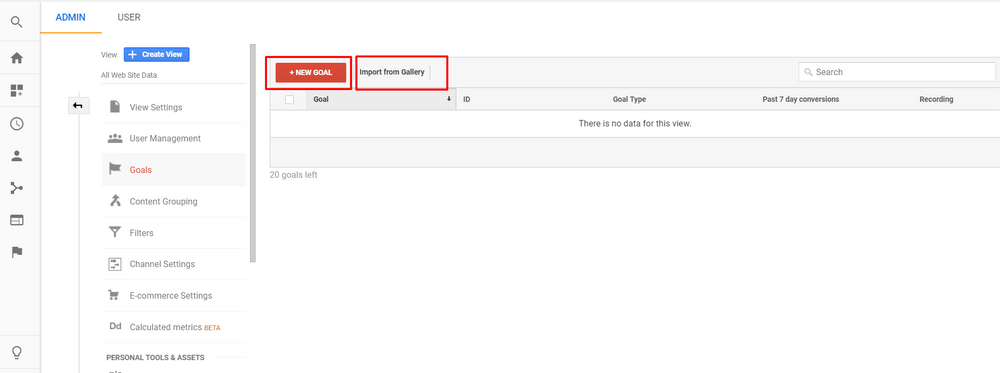
You will then see you have two options for your goals:
Option 1: Creating new goal
Option 2: Importing from Analytics Solutions Gallery (we will cover both)
Whichever way you choose, make sure to do it wisely. As you can only create 20 goals per view.
Also, once a goal is created, it can be deactivated but cannot be deleted. So, think carefully before creating a goal.
- If you are importing from the gallery, you will see a popup, which will provide you with various goal types that can directly import. You have two ways to find the goals:
- Choose the search bar
- Use filters available in the left hand section
Below every search result, you will find an option to “Import”. Along with other user-submitted goals, custom dashboards and more.
If you find a solution of value in the Gallery, click its import button and you will see a screen like below –
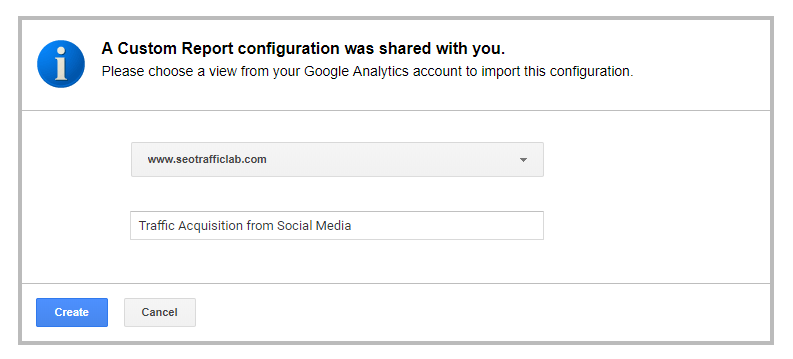
Then, select the relevant Google Analytics account and property from the url drop down and then click Create.
- To create a new goal on the Google Analytics dashboard, click on +New Goal. Where you will see two options:
- Templates
- Custom Goals
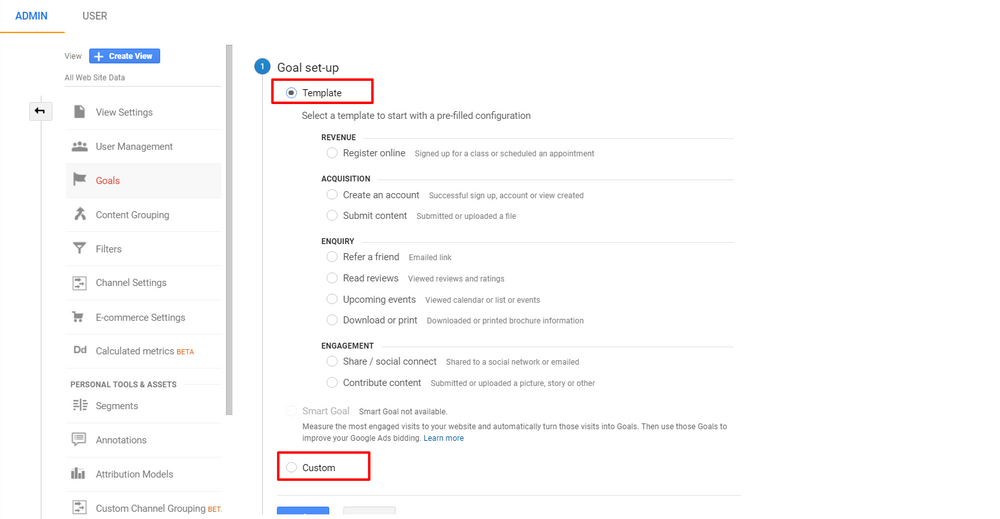
Check to see if you can find a desired goal in the “Template” section, if you can’t find one, click on Custom and then on Continue.
Once you click on continue, you need to submit the information related to the goal.

In this section, you will need to provide a Name for your goal, then select the goal type. It is important to choose a suitable name as it will help you to easily understand the purpose of each individual goal.
Then, in the next section, you will find the different goal types available: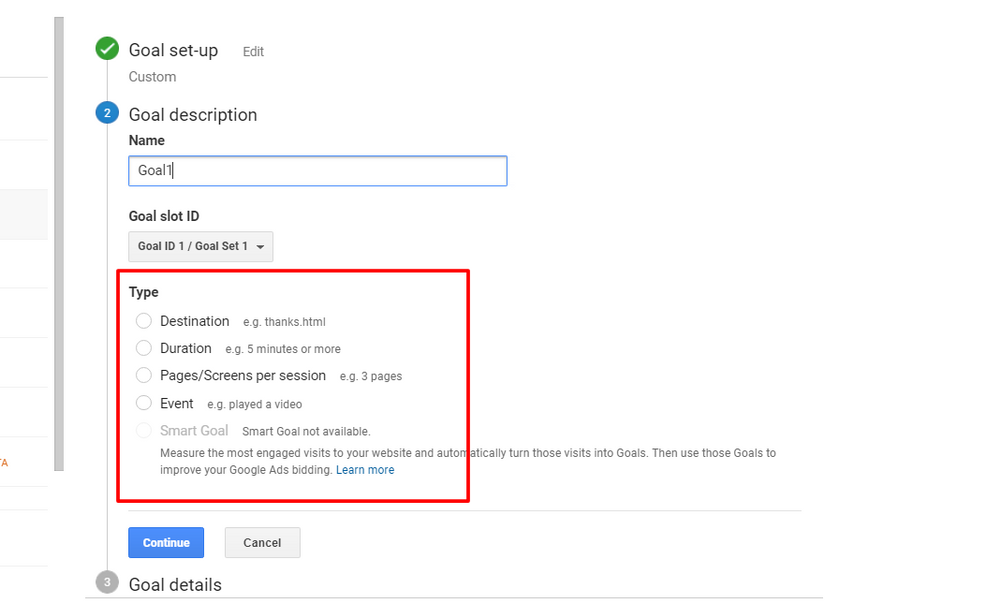
These goals are –
- Destination
- Duration
- Page/Screens per session
- Event
You can find an in-depth guide on how you can implement each individual goal, here.
5. How to set up Google Search Console
Now, it’s time to set up your Google Search Console.
Ideally you should set up your Google Analytics account first (which you should already have if you are following this process) but the process with Search Console is actually a little more simple –
- You need to go to Google Search Console
- If you already have your Google Analytics set up then you will just need to log in with the same details as them. Alternatively, you can log in with your Google business account if you don’t have analytics set up. But if you do not have a business Google account, then you will need to create one.
- Once you are all logged in, click the ‘Add a property’ button on the top of the page and enter the URL of your website.
- After you have entered the URL, you will then be asked to verify that you own the site, here are the four available options to complete the verification process –
- If you manage the hosting, you can verify via your hosting provider.
- If you have your Google Tag manager set up, you can verify via this.
- Verify the ownership via your Tracking ID (probably the easiest way and highly recommended.)
- If you have root access to your site, upload a HTML file.
With Search Console it takes around a week for the insightful data to show, but you can submit an XML sitemap instantly, this helps Google find the content on your site and index it quicker.
If you have a sitemap then submit it, but if you don’t then there are many tools available that can create one for you, plus if you have a wordpress site then the Yoast SEO Plugin will do the work for you.
When your sitemap is ready to submit, simply go to the sitemap section and click ‘Add your sitemap’
6. How to link your Google Analytics & Google Search Console
For the final step, you need to make sure you link your Google Analytics Account to your Google Search Console (which should already be raring to go.)
For this step, take a look at this video which takes you through the exact process –
Credit – Pathfinder SEO
7. How to add users to Google Analytics
Now it’s time to grant permission to your amazing team, so they can analyse the all-important data you are now receiving.
To add a user, this is all you need to do –
- Click on the gear icon on the bottom left corner
- Click on the Account User Management button –
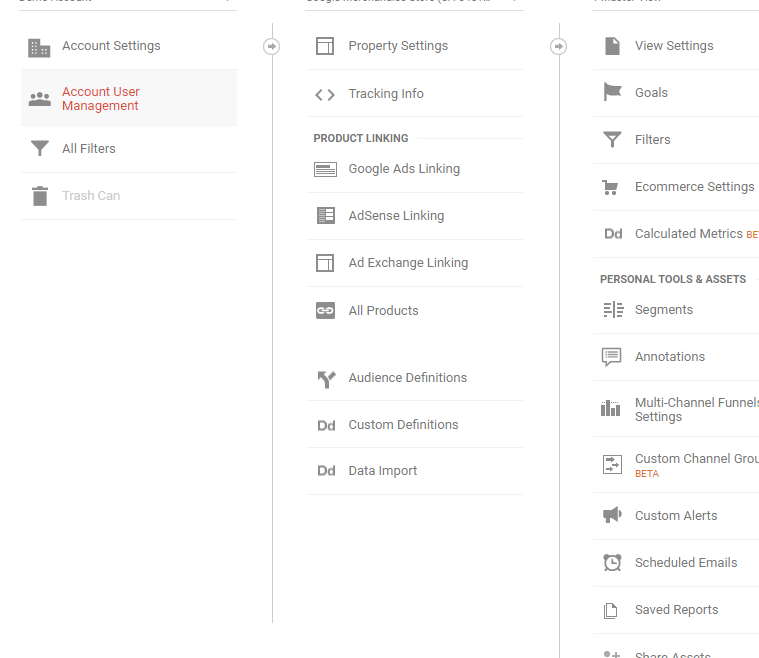
Image Credit – Google Analytics
- Click ‘Add new users’ and enter the email account of the user you want to add.
- Select the permissions you want to grant them
- Then add!
8. How to add users to Google Search Console
Adding users to Google Search Console is slightly different –
- Choose a PROPERTY
- Click on Settings (gear icon again)
- Click Users & permissions
- Click Add User and select the permissions and add in the Google account name of the user and email
- Then, the new user MUST add the property to their property in order to access.
- All done!
We have now come to the end and now (hopefully) you will be ready to create your own Google Analytics and Search Console accounts for your business website.
They are both so incredibly important to have if you are looking to further prosper your businesses potential.
If you would like any advice or help with the process then please feel free to have a chat with a member of the team today.
Free Website Audit
Let's get started
Find out how your website is performing and what needs fixing!
Find out more →Free Website Audit
Let's get started

What our client say...
“Richard and his team took a lot of time out of his day to come and visit us, see our products, see what we’re about and understand our industry. The results, they speak for themselves really.”
Chris Brady
CEO & Founder
1 Stop Spas
